https://kxbjsyuhceggsyvxdkof.supabase.co/storage/v1/object/public/file-images/MB-280/page_127_img_2.jpg
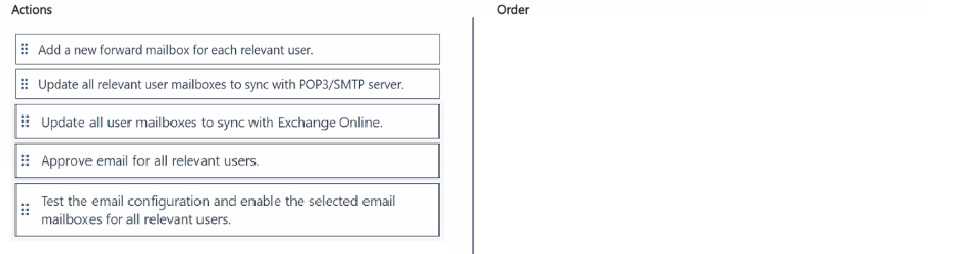
Update All User Mailboxes to Sync with Exchange Online:
Since your organization has moved from Gmail to Exchange Online, the first step is to update the
mailbox settings for each user to enable synchronization with Exchange Online. This change in
configuration aligns with the new email server settings, allowing Dynamics 365 to handle email via
Microsoft Exchange Online instead of Gmail.
This step ensures that user mailboxes are correctly configured to communicate with the new
Exchange environment.
Reference: Microsoft Documentation - Set Up Server-Side Synchronization with Exchange Online
Approve Email for All Relevant Users:
After updating the mailbox configurations, it’s necessary to approve email for all relevant users. This
step confirms that the email addresses are verified and allowed to send and receive emails through
Dynamics 365.
This approval step is required to ensure that Dynamics 365 has permissions to access and synchronize
with each user’s mailbox in Exchange Online.
Reference: Microsoft Documentation - Approve User Email for Server-Side Synchronization
Test the Email Configuration and Enable the Selected Email Mailboxes for All Relevant Users:
Finally, testing the email configuration ensures that server-side synchronization is functioning
correctly with Exchange Online. Once the test is successful, enabling the email mailboxes activates
the synchronization for all users.
This step verifies that the settings are correct and that emails can be processed as expected, finalizing
the setup.
Reference: Microsoft Documentation - Test and Enable Mailboxes
By updating the mailbox settings to Exchange Online, approving email access, and testing and
enabling the configuration, you ensure a smooth transition from Gmail to Exchange Online for
server-side synchronization, enabling efficient email communication through Dynamics 365.