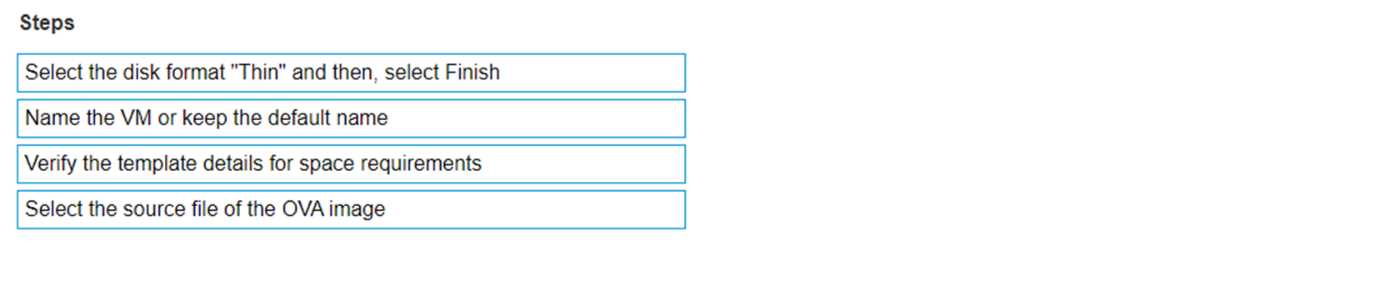
The documented sequence of steps to deploy an XMS OVF template includes: Select the source file of the OVA image. Verify the template details for space requirements. Name the VM or keep the default name. Select the disk format “Thin” and then, select Finish. Select the Source File: Begin by selecting the source file of the OVA image, which is the package containing all files for the VM1. Verify Template Details: Check the template details to ensure there is enough space on the datastore for the VM1. Name the VM: Assign a unique name to the VM or retain the default name provided in the OVA template1. Select Disk Format: Choose the “Thin” disk format to save storage space, as it allocates space as needed rather than upfront1. Complete the Deployment: Finalize the deployment process by selecting ‘Finish’, which will deploy the VM to your environment1.